experiments with additives and new paints.

First off in the quest for big cells, and lacking dimethicone ( its on the way!) I tried what I’ve seen others use, hair conditioner. I also tried some argon oil – and some hand cream with the dimethicone in… and the last one is Cyclomethicone, the first oil I tired after spray silicon. It works but for me sometimes there are thin patches in paint, sometimes showing canvas, plus it needs cleaning off before varnish as you can see it on the surface of the paint when dry.

argon oil
hair conditioner
hand cream, you can see lumps of hand cream that wouldn’t dissolve on the painting
Cyclomethicone Liquid – makes cells but I find it leaves “holes” and thin patches in paint
Cyclomethicone Liquid – you can see the uneven surface of the dry painting.

I’ve got a video below of the hair conditioner and argon oils process but I need to work on lighting, you can’t see the actual painting as well as I’d like.

I also bought some new metallic paints and I should be uploading a video of those tomorrow or friday. Sadly the memory on tablet for that ran out just about a minute before the end…more for me to learn to check!

The dry painting is below

Once its varnished the shine comes back and the metallics have a subtle gleam. This is the kind of painting I want resin for but so far I’m still working on getting it right.
Here’s one that had pin holes in coat one, coat two has ripples on surface and has slipped back from edges, don’t know why, I’d checked that and they were covered but…lets see what coat three brings once its dry enough. This resin ( the cheaper marine resin) seems to have a slight yellow tint, didn’t show on ones that were all colour but does on this one with white. I think TBH maybe i need to stick with Pebeo, I’ve had best results with that and the finish is exactly what i want, and just suck up the cost. Keep it for any real favourites.


a few more experiments, and reusing old canvas

Been busy last few days but still squeezed in a few experiments. I didn’t like the last two I showed here so over-painted them, and still don’t like one of them, so that’s in the pile to repaint!

This one looked great on pouring, but I didn’t make enough paint….so on tilting it ended like this ;-( Sometimes I gesso over old works, or paint a coat of one colour but my original thinking here was that I could maybe just cover the bit I didn’t like and keep the edges that I did. soon as I poured though I could see that wouldn’t work.


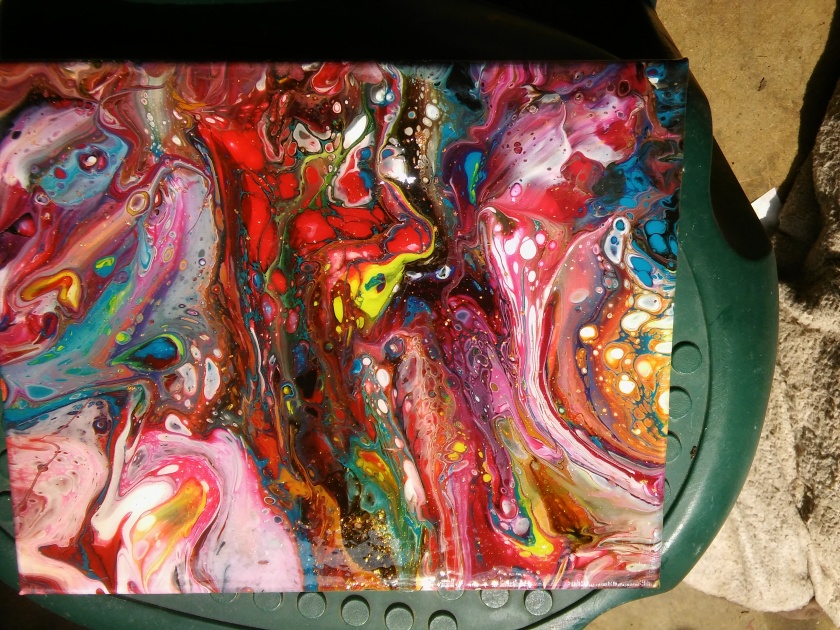
I tried playing with white negative space – I’d aimed at that before unsuccessfully so time to retry. I only used white plus 3 reds, and a red mica paint. But didn’t like it so it became the second one shown here

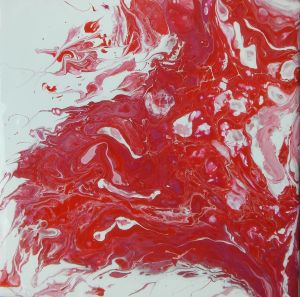
I’d actually used the same colours as on this long one but the centre of the red one was still a little wet, though I hadn’t realised so some of the painting has a pink tinge to the white. I don’t mind, quite like it.

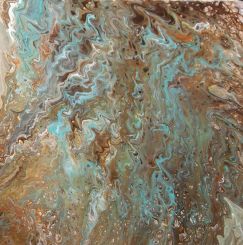
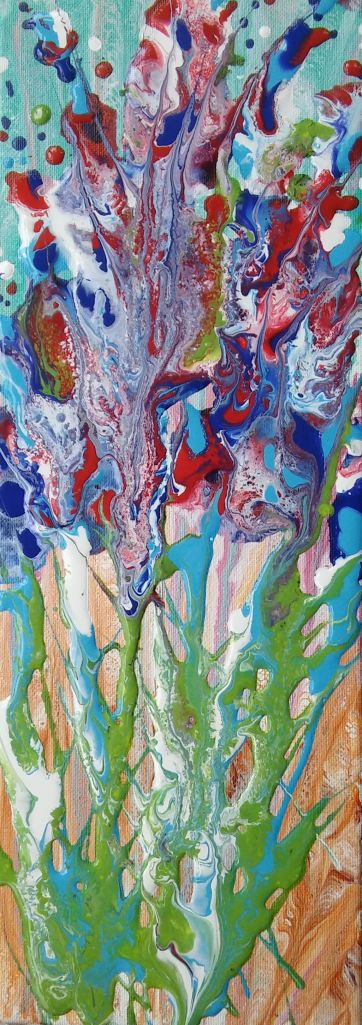
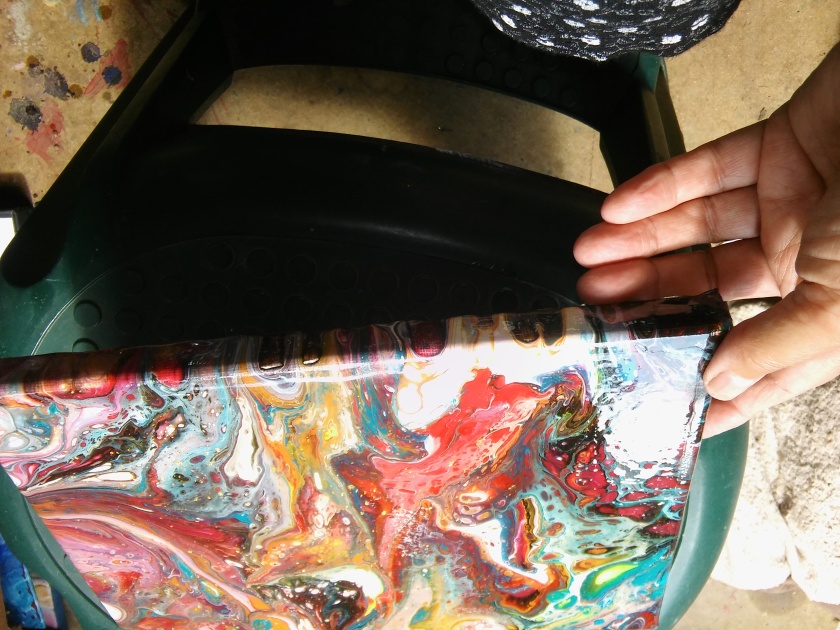
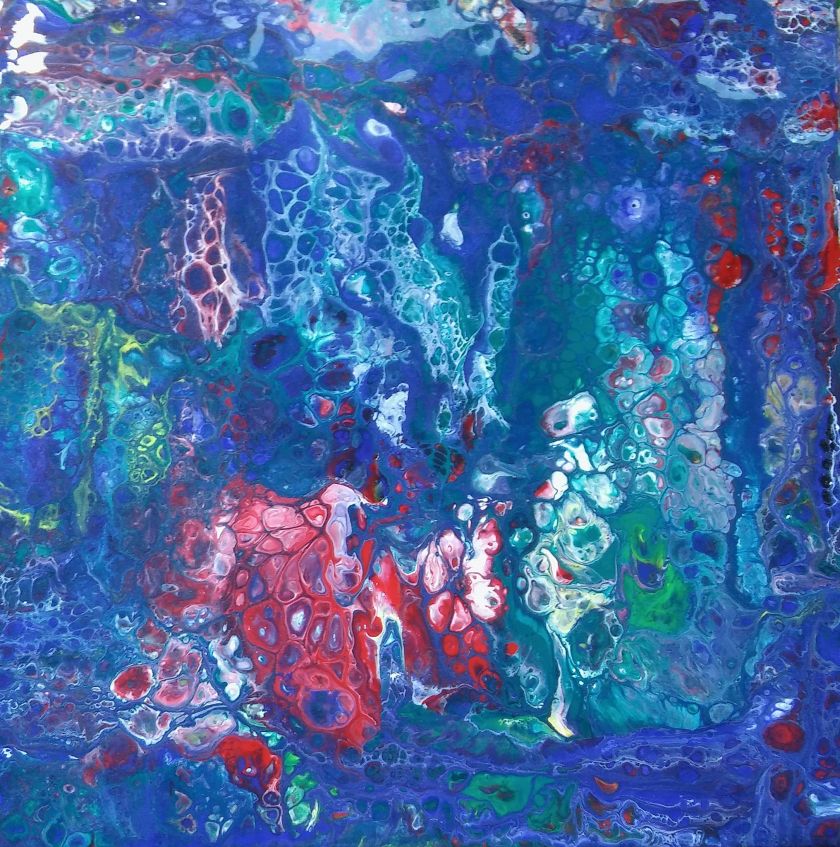
I really like this one and may…or not, brave the resin for it! Next play was negative space again, and three blues, plus a mica mix. More successful but I still want more white,. more subtlety. I tilted too much once more…

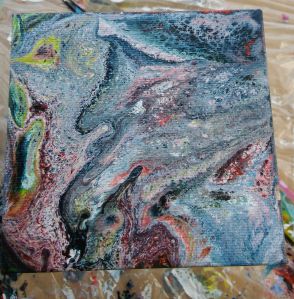
I used leftover and run-off onto some paper but TBH I’m not happy, its just a murky blue mess to me..

I love the pour on this next one but again lost it on tilting 😦 

I thought maybe it was my tilting, so made LOADS of paint and let it find its own way to edge, but I still ended losing that first lovely part, and had a tray full of mixed leftover paint. Maybe its s thickness thing? Its not because painting isn’t level. having lost a few now to that i work really hard at that before paint touches canvas, and check how it drips after before leaving it.
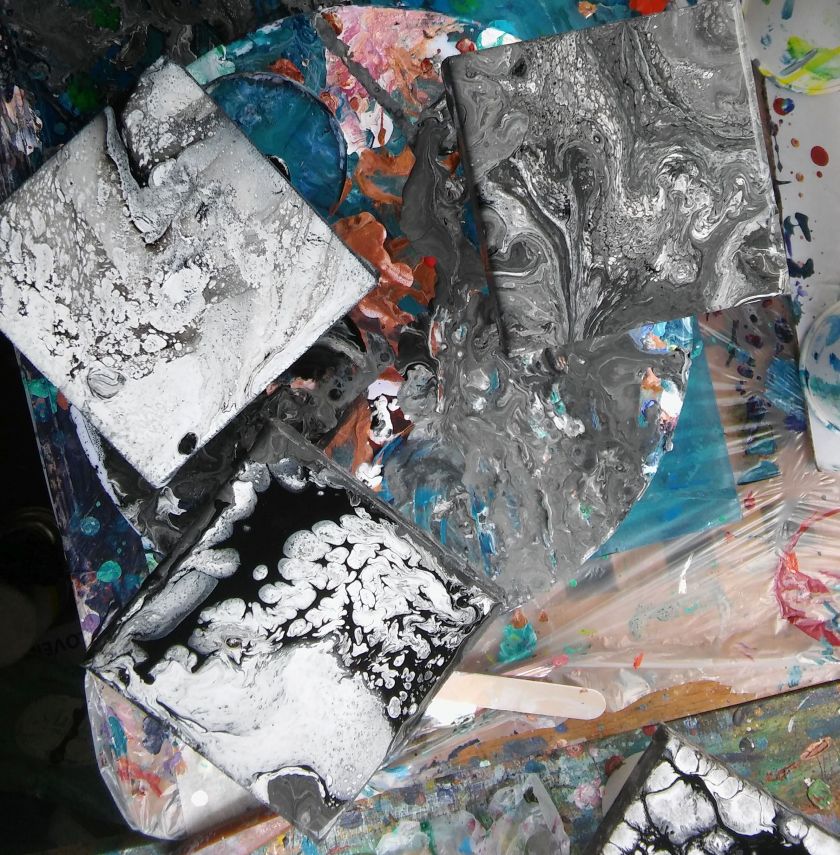
Then I saw a vid where anne-marie ridderhof ( I love her and danny clark vids) used 1 part paint to 4 parts floetrol, no water, no alchohol. as my paints are heavy body and she used fluids I thinned mine down first with water – big mistake! Looked ok on pour, though very pale, but floetrol is cloudy then dries transparent so hoped that was it. Nope, I just got a watery thin mess. Horrible isn’t it.?? Its over an old one, blue based and you can see the blue through the white edges. Next time I’ll try with paints as they are! The yellow is lumpy too – I mix and mix but that yellow, and the white seem to contain or go lumpy, and i miss it. I got my little battery milk frother out yesterday for mixing. well, I never use it for milk! more and more “house” stuff ends in art shed, I’m sure we all do it!

I’m still thinking of resin and whether to use it. I did it on two 8 x 10 inch ones, and love it but there are ripples in the surface. This was the slightly cheaper marine resin, rather than pebeo. Its a 1:50 ratio so as it took days to cure, with surface staying slightly tacky, you know, where you can see fingerprints even though it seems dry, so maybe i didn’t quite get that right. Its harder with that small amount of hardener to be precise, whereas the pebeo was either 1:1 or 1:2 – can’t remember but easier and i like the finish better. Did the pebeo on 3 3×3 canvasses to trial. On those I’ve a couple of little dints even after two coats so I’d seen a varnish that it supposed to help with ripples and dents on resin finishes, so bought that and tried yesterday. It evened the ripples a little but I think the sine is a bit less, and on the small one it helped with the dint/dent but again reduced the glossy shine. I don’t know if maybe once its thoroughly dry it would come back if it was polished with a little wax or something? I also want to try it over a conventional varnish, see how that looks…
The one on the left is the one with the aerosol extra coating. It looks a bit smoother but the colours don’t seem as bright and the gloss is less.

I’m hoping to create a links page with all the materials I’ve used soon. Just need to find time to work out how to do it 😉 Then if anyone wants to use what I’ve tried you’ll know where to find it. I know I’ve found lots of my experiments from other people’s pages and links are always helpful, but I’m not greatly tech minded so it takes time for me to work out how to do the wordpress page stuff, without it just being a jumbled mess.


Chasing Rainbows…and other things.

yesterday I had a peek at Wednesday’s  painting and it was drying well, and then I used leftover colours to do another to match. It poured out really well, but of course something always goes wrong, this time I think maybe I’d made paints tiny bit too thin and it ran and spread losing that lovely shape. I did some tilting and pulling through. I like the end result but love love that just poured one. someday I’ll get the paint to stay like that 😉
Wed painting above, from start to final, I haven’t got dry pics yet. They’re taking a while with all the damp we’ve had. You can see green, I didn ‘t add green but guess that’s from the sienna or the orange and the turquoise blue.  I used a pale cream instead of white for outer, then orange, burnt sienna, van dyke brown, a pale apricot, turquoise and the frosted blue mica. 
Sadly this changed alot, maybe paint a bit too thin? It ran and when i tilted it ended like this. I had fiddled a bit *blush * as I wasn’t happy with parts so I’m kind of undecided about it. see how it dries, can always add more 😉
Here’s my rainbows, not sure if I added them yet? I started with the bottom one to try out, but didn’t like the effect when swiping over the whole, so I swiped each colour individually on the larger one. For some reason when the small one dried the paint had cracked, don’t know why, didn’t do anything different.

Then I tried one without black, again swiping each colour one by one. This
is on an old canvas-board painting I no longer like 😉 No waste here. And on that theme the remnants from each cup plus collected run off made up the two 3 x 3 inch canvasses. Actually I really like them. Of course they all dull when dry so I’ve been trying different varnishes.
 
Nathan managed to find a wet bit in my non-black rainbow one yesterday, lovely fingermark in the blue…..”err, nan….” he said sheepishly. Bit of alchohol and water and smearing with tip of finger and its barely noticeable.
As always the colours dull as they dry and I’ve been playing with different varnish to see what looks best, which brings out that rich colour again. Still think resin is the king, but price and difficulty is stopping it being my default varnish. I did try a cheaper one than the pebeo i used first time but that doesn’t seem quite as good, however it could be that perhaps I didn’t get the % right, its 2% hardener to resin, whereas the pebeo is 50% and that’s much easier. With tiny amounts its a big thing is you get a tiny little too much or too little hardener, and as the finish I have is not quite that glassy hardness maybe i got a bit too little. I’ve seen a spray that may fix that so that’s on the way too, sadly its very expensive though ;-( as its shipped from US. I don’t know enough about it yet to see if there’s a comparable one in UK. 
 

Densities using cake cutters and lots of colours.

I’ve been having fun playing and run out of 10 x 8in canvas, but I love working big so took out a 40 x 60 cm one ( 16 x 24 ins). these are so much fun but tale loads of paint and ages to dry, depending on weather of course. Even the tinies took a while with all that rain last week. Here’s the result wet…and I was very very careful to keep it level and not knock it, checked back several times 🙂

I mixed up lots of colours, white, black, turquoise, cerulean, sienna, pthlalo blue, primary red (that’s really a pinkish red rather than the pillar box red I’d expect) bright red – that’s a scarlet one, yellow and mica powder mixes of a pink and blue that are both metallic. I mixed the micas with just floetrol and alchohol, I found adding them into paint just gets them lost instead of making the paint a metallic shade. I didn’t use any silicon, I’m trying to stay away from it, sometimes its fine others it makes the surface uneven and I get “holes” in paint that irritates me….
I used three cake cutters, layered the paints in reverse density til pots full and then used rest of colours to fill in round edges. I had mixed extra white for this purpose. The paint kept seeping out of the pots as they filled but I just ignored that 😉


Looks like nothing doesn’t it – but all will come right – honest!


Its getting there. I was hoping not to tilt too much to keep the cells but ended up tilting quite a bit. I’d left the micas til last so once canvas covered I swirled them over, but they dominated too much so I used a stick to pull them around and through colours and pulled some colours though the micas. As they dried they got more transparent, and also some colours popped through them. I don’t know anything about densities for them so it was all a bit of suck-it-and-see process. I like it though, keep seeing little faces as it dried, some stayed, some got lost. there two are gone but were fun when I saw them, scary skull and  crazy owl. I love the way there are cells, within cells and layers of colour in lots of them.

You can see how the mica spreads and has become transparent. I guess if I’d used less mica to floetrol it would have been more transparent, it was just guess work really. I like it. I’ll tuck that first one underneath so you can see how its changed.  

the colours are less vibrant but that always happens as they dry, varnishing will bring that back. I’d really like to resin this one but…it’d take loads, and I’m not confident I wouldn’t cock it up 😉 so for now it’ll probably be the polycryl varnish i’m using, though I have just got this one, so might try that….

Today I’m going to paint…a rainbow. had the idea yesterday, layered the colours with black in between so I can swipe, tried it on a 3 x 3 in canvas but lost the edge colours. This time I’m going to try swiping each colour individually too, leaving more on edges so hopefully colours stay clean and separate and I don’t lose the end two…Pics tomorrow, or thurs. If it doesn’t go completely wrong of course….
I’m using paints and medium by the bucket load it feels, done two 1lts of  floetrol, and halfway down the 2.5 litre tub….I really need to start selling some to pay for more stuff! I’ve got around 40 or so canvasses finished and stacked in studio. Money for new paints and more space in the shed would be great! I keep looking at new houses with an eye as to where I’ll be able to paint. Did see one with a fab garage with windows, water and electric and nice painted concrete floor. Have to sell this one first though.

Lucky I don’t smoke or drink, and now there’s not horse bills either so that helps. Its not a cheap hobby but a fun one. I know people do it using cheap paints, house paints and glue or even washing up liquid, but I’m aiming at selling some eventually so want to ensure the paints don’t flake, fade or fall off over time. I’ve always been aware of the cheap paint v longevity argument, it doesn’t bother many artists, but for me its important so I have to try to fund it some way.


revamping an unloved painting, and playing with densities.

So the one I didn’t like on Sunday got a revamp yesterday…I’m still not totally sure about it but had fun. I was aiming for a kind of floral look, like tall foxgloves. Again just dropping paint and letting it blend, and pulling through to create some shapes and help that. 

Then I played with paint densities, looking up closest to what I had and just letting paint tip and flow very little, no silicon, and torching after.


I’d run some white over sides and corners before pouring and was really pleased but…though I spend ages ensuring surface was level I must have knocked it as the paint ran off one side. I came back 3 hours later and saw it, managed to move a bit back where it was still wet in centre but 😦 this is how it ended. still nice but not as I wanted.

I did this one with same colours but much more tipping to cover the canvas.

You can see the colours mix much more, lose their richness though I do like the ones they create by mixing. also the cells seem more this way but much smaller. I’m going to try this again. I used different colours as I was using an old canvas, so covered it in black first and used black on corners and sides instead of white.

Looking at it now I wish I’d let paint run more on one side, or placed it less central. It irritates that its kind of centred but not very well and I’d rather it looked like a deliberately off centre pic! Did this with same colours. I’d painted white on sides and corners but it didn’t look right somehow so ended up tipping a lot more to cover the white.

I still had quite a bit of black and white so played with some 3 x 3 in canvasses. white over black, black over white and then just pouring over all that I’d collected from runoff. The first one – the one on its own, I really liked – can’t recall white was over which now but I’d used an old canvas that had maybe three other lots paint under and I ought to have gessoed it as the surface is bumpy and not smooth and these paintings mostly look best on smooth surface.

I tried resin on the circular cake-boards, wasn’t a sucess, too many uneven and bare patches, might have been the silicon. I used varnish on the other two and that looks better. I’ve painted another plain and glued to back to make it sturdier but not sure how to fix something to hang it with. Shame about the resin and it would have made these much stiffer and worked well IMO. Still…maybe I’ll try another and not use silicon. all fun experimenting but the resin is so costly I can’t really play too much with that. Chris and I love the two pink sweetie coloured ones that have been resined. Its not easy to show but the surface looks and feels like glass and it really show where the gold sparkles are and gives a feeling of depth.

Time to add some to art sites now and hope for some sales so I can play more 😉 If anyone is interested in any of these email me, the 8×10 inch ones are £32, 3x3in £10 and others similar price depending on size. The most expensive is the 20 x 20in orange one at £120. I’m happy to take commissions too, you choose colours and I’ll create two for you to choose from.


So Sunday I went in studio just to varnish and….

you know how it is, an idea springs out and you have to try it. Sunday morning I’d a couple to varnish and got an idea while I was there…Wet image first, then 24 hours later.

I lost most of the sienna brown there but finally got some large cells that stayed after drying. Weird as I do the same thing another time and comes out completely different. Also tries some on round card, round canvas is too expensive to play around with 😦 but I wondered if the round shape might help with keeping it how I intend…well, that’s always possible 😉 . I used a straw to blow paint around on these, first time I tried it. I like the second one best.  Then one of the granddaughters came over, she’s nine and loves this way of painting so we had to do some when she saw the new turquoise paint I’d bought, one of her fav colours. She got a little carried away with sprinkles, (she shares my glitter addiction!) gold, silver and blue for her, but its her painting and she loves it. we used straws again, after adding colours individually to canvas.

we used the same colours, yellow, turquoise, a dark turquoise green, and a mid green we mixed from dk blue and yellow.

Monday I really wasn’t going to paint….had gardening planned but I had an idea. Wasn’t really the sucess I wanted, so I played more and messed up even more 😉 but hey, I can paint over once its dry and I now know that idea won’t work. Well, that way anyway…
I swiped this, but wasn’t really happy with it so pulled up and down to create shapes….and I like that even less! I do like the colours together though

I hate waste and I had some colours left and a bit of sundays green and yellows were still ok, Not much white but quite a bit of driops collected off the two above so poured it over a round board and actually I like this one! even enough for a tiny 3 x 3 in canvas which was looking good til i dropped it. Oops!


painting over “fails” to create new works.

Still wasn’t happy with the one from Thursday, which was over one from earlier in week, which was over an old, not loved any more painting….so tinkered yet more yesterday. So incantations one, two and three…
First go over old painting, added varnish to the medium just to see what would happen….

Close up of section from above painting. See the little pinholes all over? Might have been the varnish trapped air perhaps??

Then I didn’t like it, even apart from the pinholes so I added more paint….


Still felt it was a bit dull and bland so tried again, and this time I’m happier. Time to put aside though, I like it a bit, but overall its been a lot of paint and medium for a just OK painting…I think that’s it for this one, still uncertain I really like it, parts of it but the whole? Dunno…its got more life in it but I think its time to put this one aside.
I got a new colour yesterday, a gorgeous rich pale green/turquoise….I’ve been waiting for that so today might be one with that plus the burnt sienna and deep turquoise green from the other day. I might add in cerulean, possibly apricot too. that’s half the fun, picking out colours and seeing how they turn out. I still want to see if I can make the irridescent medium work too.
I’d run out of floetrol, been waiting for a 2.5 ltr bottle to arrive and hoped what I had would last, but it ran out, so to bridge the gap I ordered a 1ltr on amazon prime. sod’s law the 2.5 lts arrived Thursday, and the 1 litre wasn’t then needed but I hate cancelling, its not sellers fault, and it’ll get used so I left order. Then it arrived yesterday and…I’ve ordered the wrong stuff, same make but I’ve ordered a pre treatment. 😦 I’ll try it anyway – who knows, might work?? Exactly the same price and very similar label so i can see how I made mistake. If it doesn’t work for paintings then it’ll be there when I need to paint something, says use on surfaces like plastic and melamine so useful to have.
I think I might go over this one, not happy with it so use as a base for today…this was the sienna and green turquoise from the other day, where I forgot to add silicon…mixed more paint and swiped over but its pretty muddy looking and no real interest. Its easy to fiddle just that bit too much with these, then lose that freshness and I think that’s whats happened here.
I hate waste so reuse old canvasses, sometimes gessoing sometimes just straight over. Gesso is best I’ve found if they’ve been varnished though. 

Another Fail ;-( but I know what went wrong….

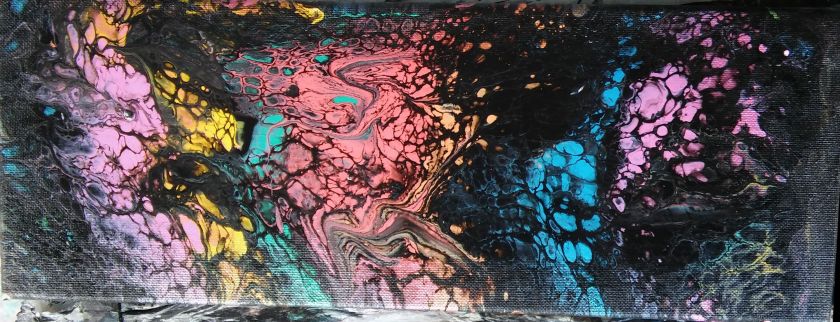
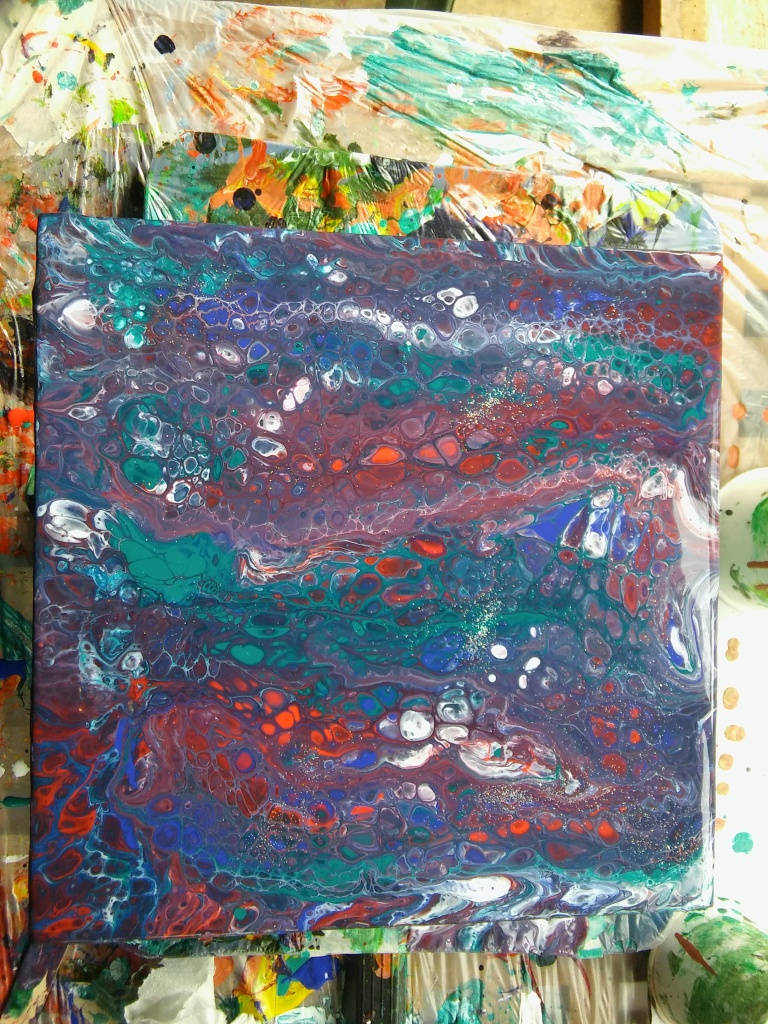
This was yesterdays work. Used an old canvas and wanted to try the iridescent medium that had just arrived. I used crimson, purple, yellow and white. Mixed as normal but forgot the silicon in the cups….didn’t realise til after I’d swiped and nothing happened. I poured a little of the colours into separate cups and added iridescent med so I’d have hopefully one plain and one metallic type paint for each colour.

After swiping and realising I’d forgotten the silicon, I sprayed the canvas, and also added a couple of squirts into all paints. Then poured more over, and swiped once more. This time some cells came but all that swiping mixed the colours and TBH it just looks a mess to me.

Here’s the holes in the other canvasses which I think were due to adding varnish as a medium…well, that’s my guess. Could be something else.


I can’t do any today as I’ve used all my floetrol, and the next I’d ordered (2.5 litre from ebay) I didn’t notice wasn’t coming before 12th July. So sucked it up and ordered another 1 litre from amazon to come tomorrow.

#Fails….. :-(

I’d new colours, phthalo turquoise and burnt sienna arrived, Daler Rowney.  ( snigger, each time I write phthalo spellcheck asks me is I really mean ophthalmic …)


I’ve not used that range before but as this uses such a lot of paint I’ve been trying a few cheaper ranges….
Usual floetrol,spray silicon, alcohol, water mix. I covered canvas in thin layer white, dropped sienna over two thirds and blue over two thirds so the centre third had both. then white at each short end and swiped across from ends.
Nothing happened…then realised I forgot the silicon. Oops 😉
Tried spraying canvas and torching but only got few cells, not much movement so I added silicon to leftover colours and redid what I could with what was left. swiped again, and get a bit more life in it.
I didn’t like corners though so swiped with leftover paints, mostly white, some colour. Then torched again. It was better but I still wasn’t happy so I let it run a bit…too much though.
I think the paint was too thick so as it ran – very, very slowly, it pulled out all the cells and just blended colours making a painting that’s just a mess. Join Monday’s two disasters….
All a learning curve though. Thickness is something I struggle with, sometimes I’m spot on, others its that teeny bit too thick, and that results with tipping pulling everything too much and blending, or else its too thin and it runs off canvas.
The two I showed here yesterday dried with tiny pinholes in, which I think must be the varnish, only time its happened before is when I was impatiently waiting for medium and used PVA. It works for others but for me it resulted in pinholes and cracks…the colours look very drab now too, dark and dreary so those will go for repainting too.
Its strange how some mediums work for some but not others. PVA is a non starter for me, though I just remembered I bought a different kind to try, I found floetrol and liquitex pouring medium pretty much the same. I use lots of floetrol, up to a 1:1 mix and yet others seem to just add a tiny bit, but when I do that nothing seems to move. Its still pricey here in UK but cheaper than liquitex so that’s what I stick with for now.
I have issues with silicon too, if I use liquid and rip it it it leaves “holes” in my canvas where paint is really really thin, and even if I really mix it in well and minimise that it still dries unevenly and yet I’ve seen people just add a few drops, not stir and it comes out perfectly.
Maybe I need to try a different type, I used cosmetic silicon, and I’ve seen lots use treadmill silicon. Perhaps that should be my next experiment. I really really want to get some large, clear cells, and keep colours vibrant.

some darker works, and new paints

Did some varnishing yesterday. Of course while I was there has to have a little play…

Second pour

First pour

I tried a little varnish in with the paints and usual mediums. Be interesting to see if that keeps any of the colour brightness when dry. Or is a total fail 😉
I think I may have got a little too much black in. These were dirty pours, I’m still finding it difficult to keep colours clear this way and get good cells, swiping seems to work better for me but I’m determined I will get clear colours/good cells this way 😉 eventually…..The second one has much brighter colours and maybe it was because I used same dirty pour pot for the first image after doing this one.  I hate waste so try to reuse things and as I spray pots with silicon before adding paint ( when I rememeber!) I wiped out the dirty pour with paper towel to reuse and maybe a bit of the colour was left in corners and muddied it a little. these are on deep canvas which I painted black and I’ve left the sides plain rather than trying to cover in paint. I find that’s hard on deep edge and I tend to spoil the top while I’m doing sides.

The resin pics were still a bit tacky and need a second coat when dry but did second coat on the big orange pic, and all the smaller ones from last few days that were dry go a first coat. Second today hopefully. then I’ll show pics showing just how much dif to final colours a good varnish makes, really brings out the depth.

I’ve some new paints arriving today, some taking a few days. I love siennas, and haven’t any except little tubes and I could use one of those up in a couple of pours…so its off to amazon again. I was just looking for burnt sienna and a turquoise/cerulean type colour but of course….found more. I could spend a fortune on paints and stuff. Even restricting myself I spend far too much 😉


Amsterdam Acrylic Colour 120ml tube TURQUOISE GREEN.Daler - Rowney Graduate Acrylic 500ml Paint Ink Bottle - Burnt Sienna

Phthalo turquoise, turquoise green ( could only get this in 120 ml tube 😦 ), burnt sienna ( don’t know why pic shows as pink..). I could have chosen loads more…so amny colours! I do like mixing my own, and always used to do that with browns til I found siennas and umbers, they are such lovely rich colours.